0 £0.00
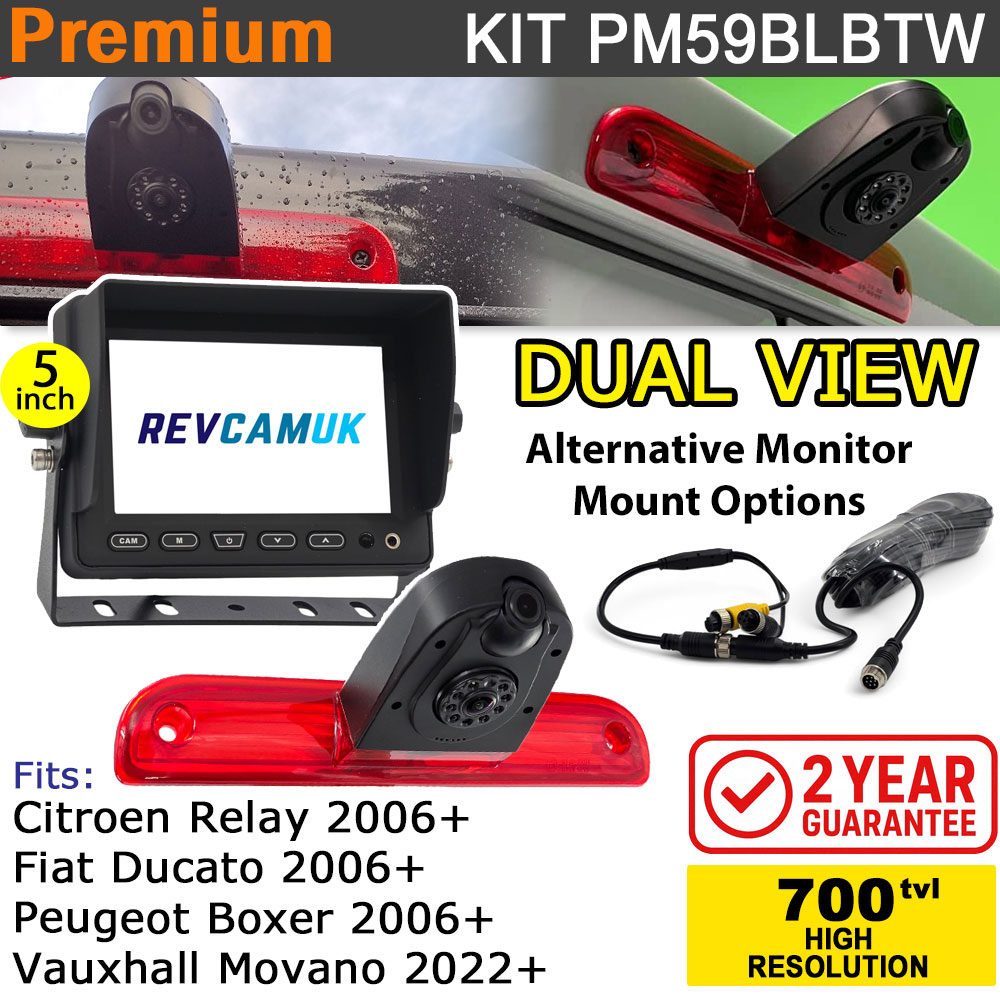
Fiat Ducato / Citroen Relay / Peugeot Boxer / Vauxhall Movano Twin Brake Light Reversing + Rear View Camera kit with 5" Monitor Display - PM59BLBTW
Category: Van Reverse Camera Kits
Description
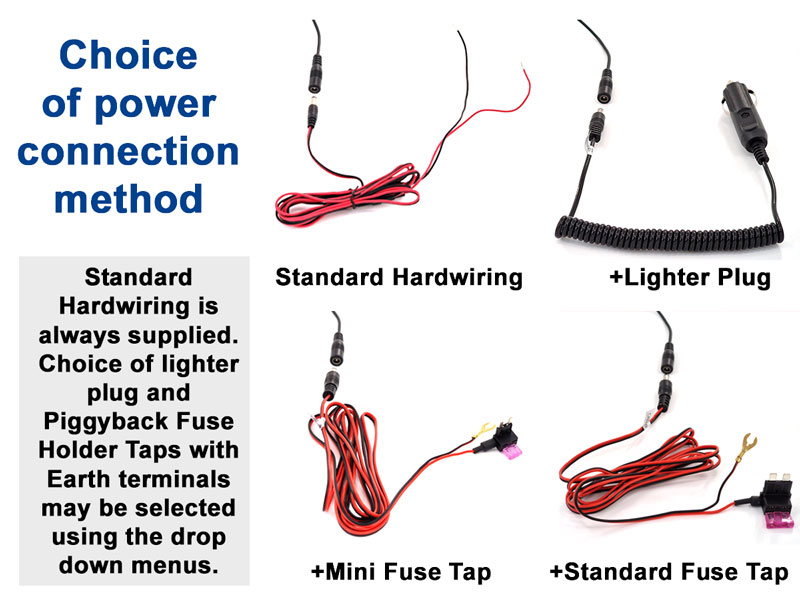
About the Twin Lens Ducato/Boxer/Relay brake light reverse camera kit with 5 inch displayThis is our very latest addition to the brake light camera kits. We have had the single-lens version of this camera for a number of years now, we were frequently told by customers that they would love an option to view behind whilst driving (like our twin-lens cameras), well after some development with one of the factories we use we are finally able to offer this fantastic solution. Two cameras in a tidy "factory look" housing, the old LED strip is removed from your old light and placed into this camera housing. Run the cable to the monitor, supply power and that is it (we even do a lighter plug option to make it even easier if required. This particular camera kit is supplied with a 5 inch high resolution dash monitor, this is supplied with a U bracket mount as standard but a variety of other brackets can be selected here. Please note:- some early rare models of this van have a different style brake light that bolts from the rear, the majority have the screw from the front version as used in this kit. If you can see screws when viewing your van from outside then this kit should fit. What vehicle does this fit?Fiat Ducato 2006-Present (with screw from the front fixings) Citroen Relay 2006-Present (with screw from the front fixings) Peugeot Boxer 2006-Present (with screw from the front fixings) Fitting the brake light cameraFitting the brake light camera is very simple. The brake light reversing camera re-uses your existing brake light strip. Simply remove the existing brake light via the two securing cross head screws. Gently release the three tabs on the top and bottom of the brake light to release the light strip. Then transplant this in to the new brake light camera. Re-screw this back to your vehicle with the two original screws. See our video below for details about fitting the brake light camera Add an additional monitor bracket/mountWe can supply a discounted additional mount/bracket for the monitor when ordered at the same time as the kit. Please see the photo below, and make your selection using the drop down menu above the add to cart button. 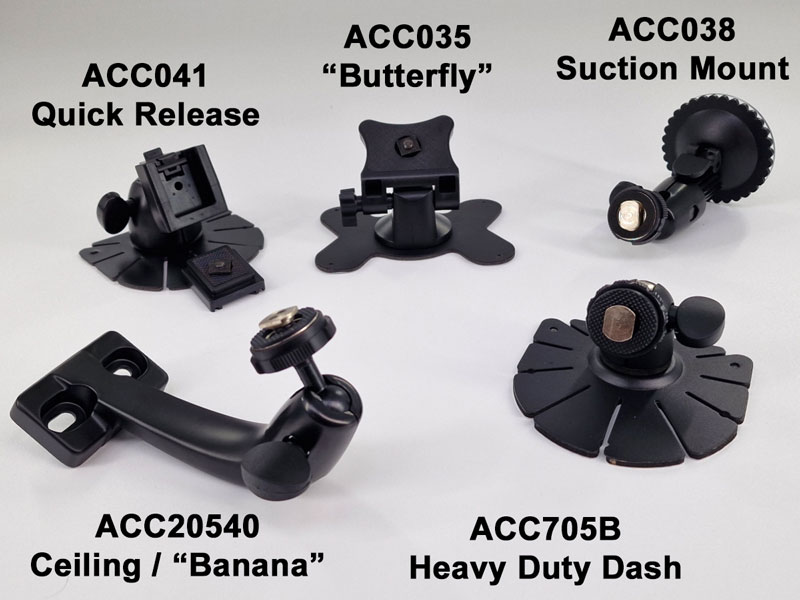 See our video below for details about the brackets in the photo above. Choice of kit power options
 Easy-Fit Wiring
Image Sensor for CameraThis particular system uses two of the 700TVL new generation CMOS sensor, which is right on the upper scale of picture quality. 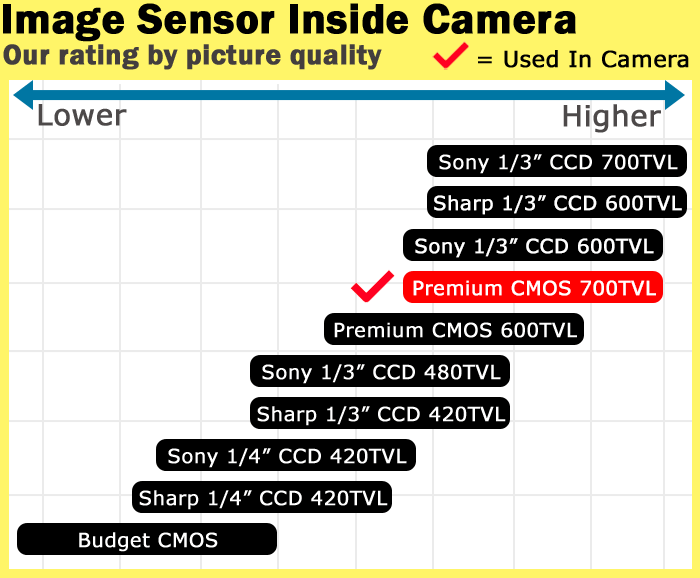 Monitor has Digital LCD Panel - Not Standard LCDThe monitor uses a Hi-Res digital panel screen with more than 3 times the amount of pixels of the standard analogue LCD screens most other retailers sell. (Please note some sellers multiply the first number by 3 for RGB, if we were to do that it sounds even more impressive (2400x480). We prefer to keep it simple but check carefully our competitors, the last number is normally better to go by as this is the number of vertical lines of pixels. 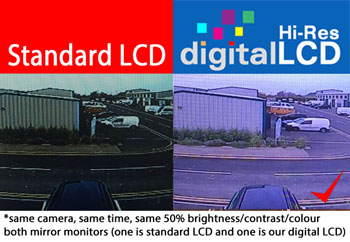 2 Year GuaranteeWe supply with a 2 year Guarantee with us, meaning we will repair or replace any non-user damaged parts that are deemed faulty. Our failure rate is very low even beyond these two years, if you have a problem outside of 2 years we should still have compatible parts and possible repairs for reasonable amounts.  Parts Tested in the UKThe parts of this kit will have been tested twice, once by the factory and once by us. We check all the items in the kit including all cables, trigger wires, IR leds and menu functions to reduce any chance of having a non working part. Our fault rate is extremely low, and we just like to ensure that we avoid any imperfection slipping past. This is why professional fitters love us. |
Detailed Images
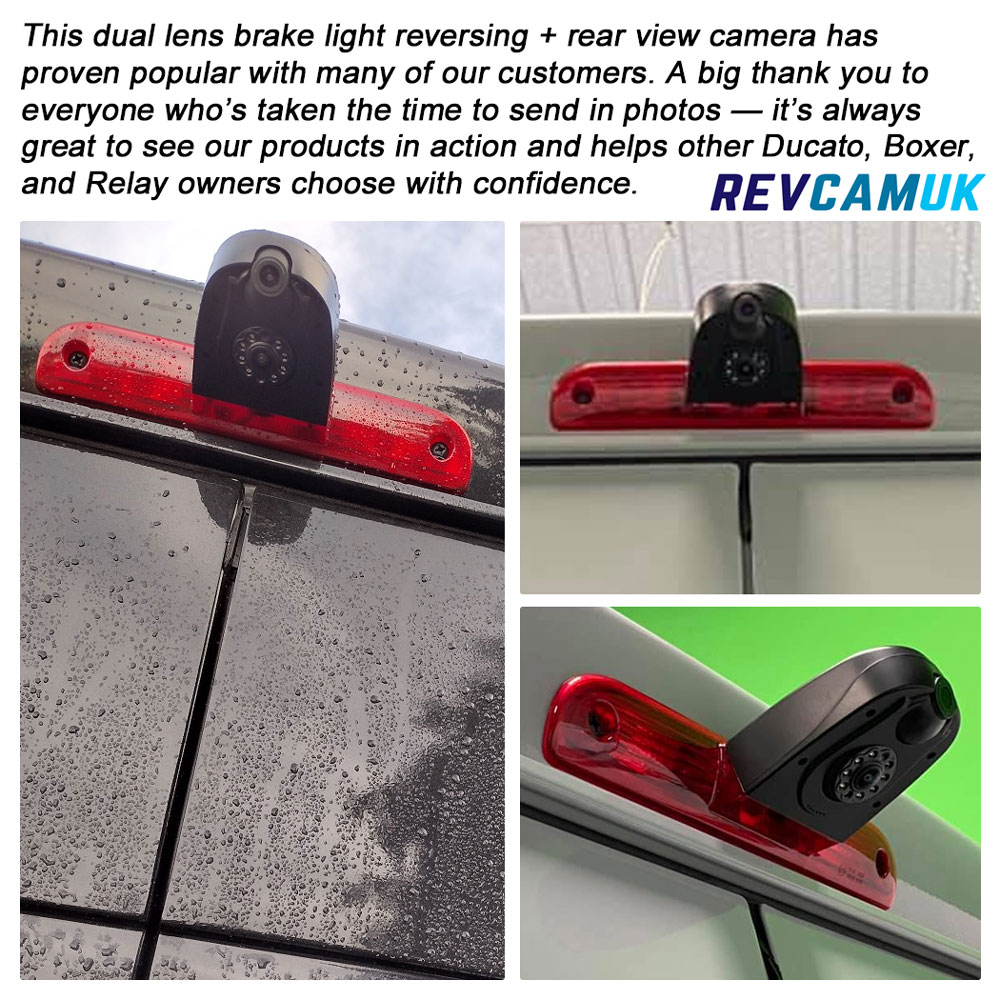
Dual lens brake light reversing and rear view camera installed on Ducato, Boxer, and Relay vans, with thank you message to customers for sharing installation photos – REVCAMUK.
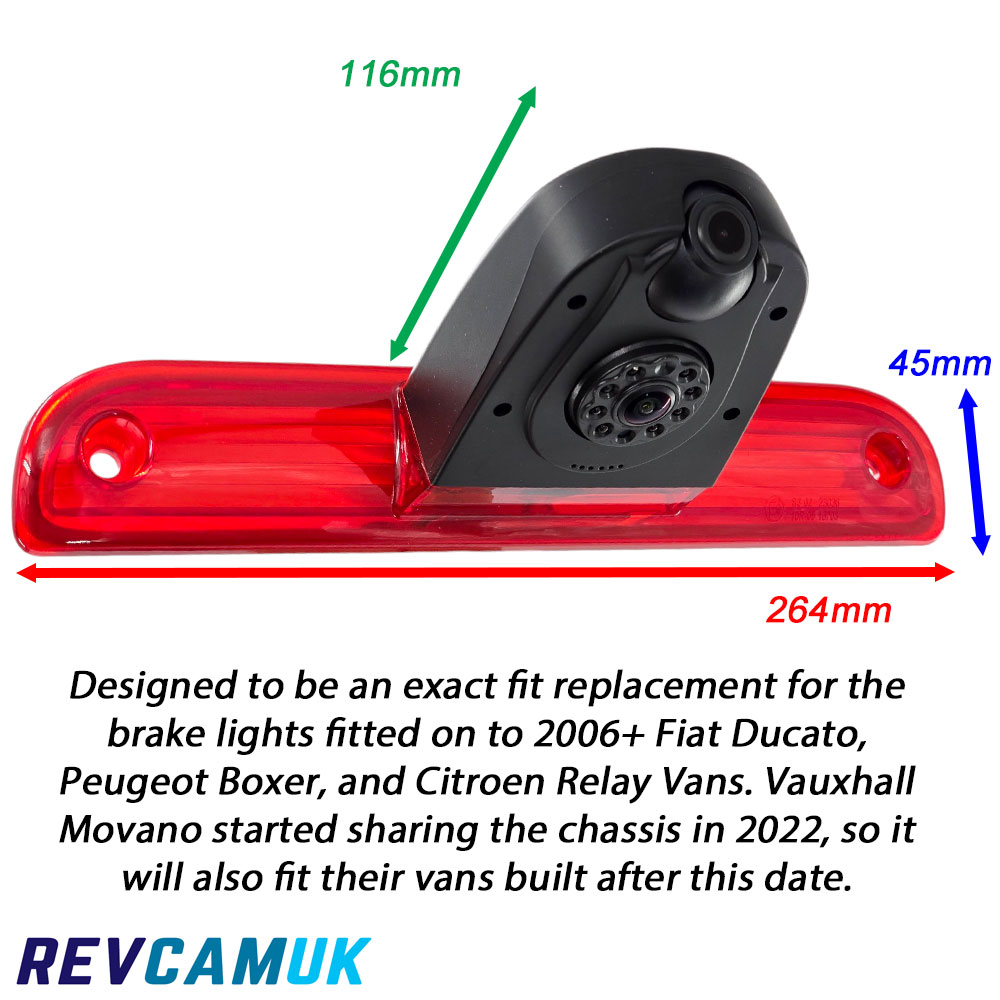
Dual lens brake light reversing camera dimensions for Fiat Ducato, Peugeot Boxer, Citroen Relay, and Vauxhall Movano vans – REVCAMUK
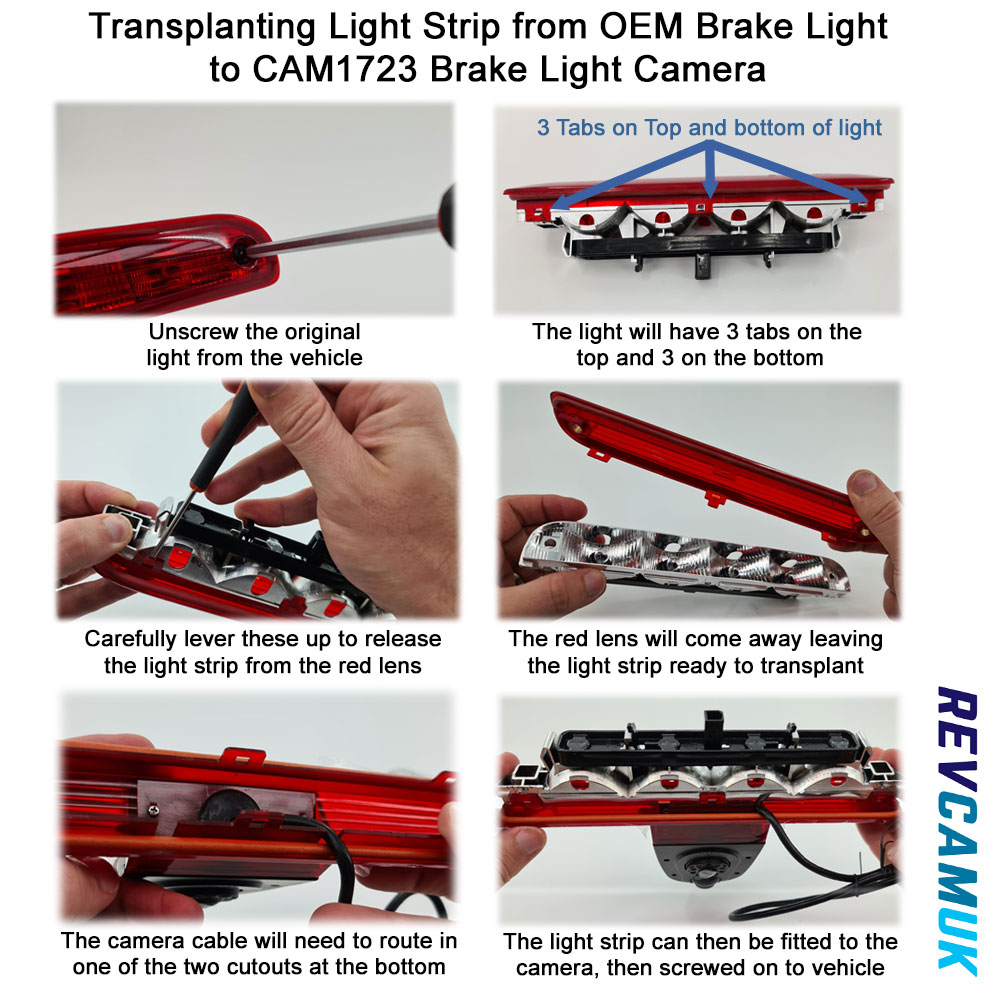
Image Showing Transplantation of OEM brake light strip to the new CAM1723 Brake Light Camera Ducato Boxer Relay Movano
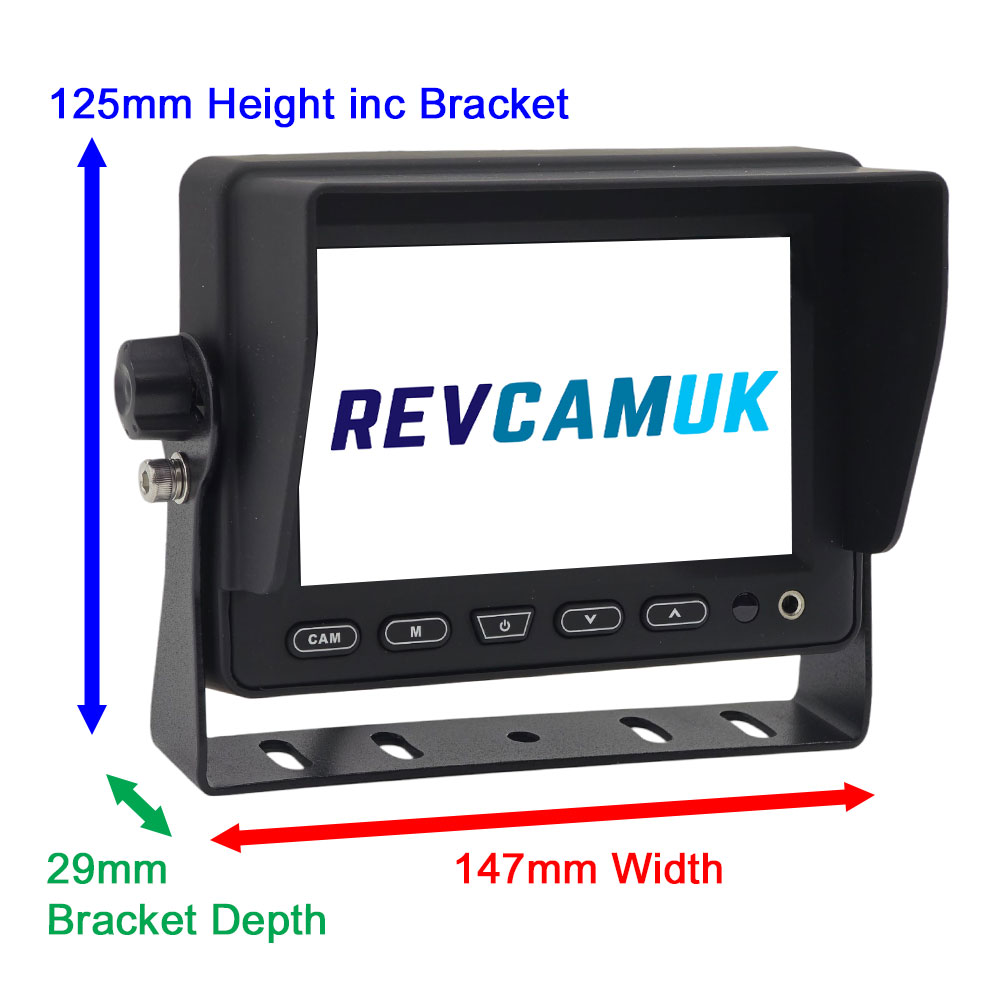
5 inch vehicle monitor dimensions showing 147mm width, 125mm height including bracket and 29mm bracket depth
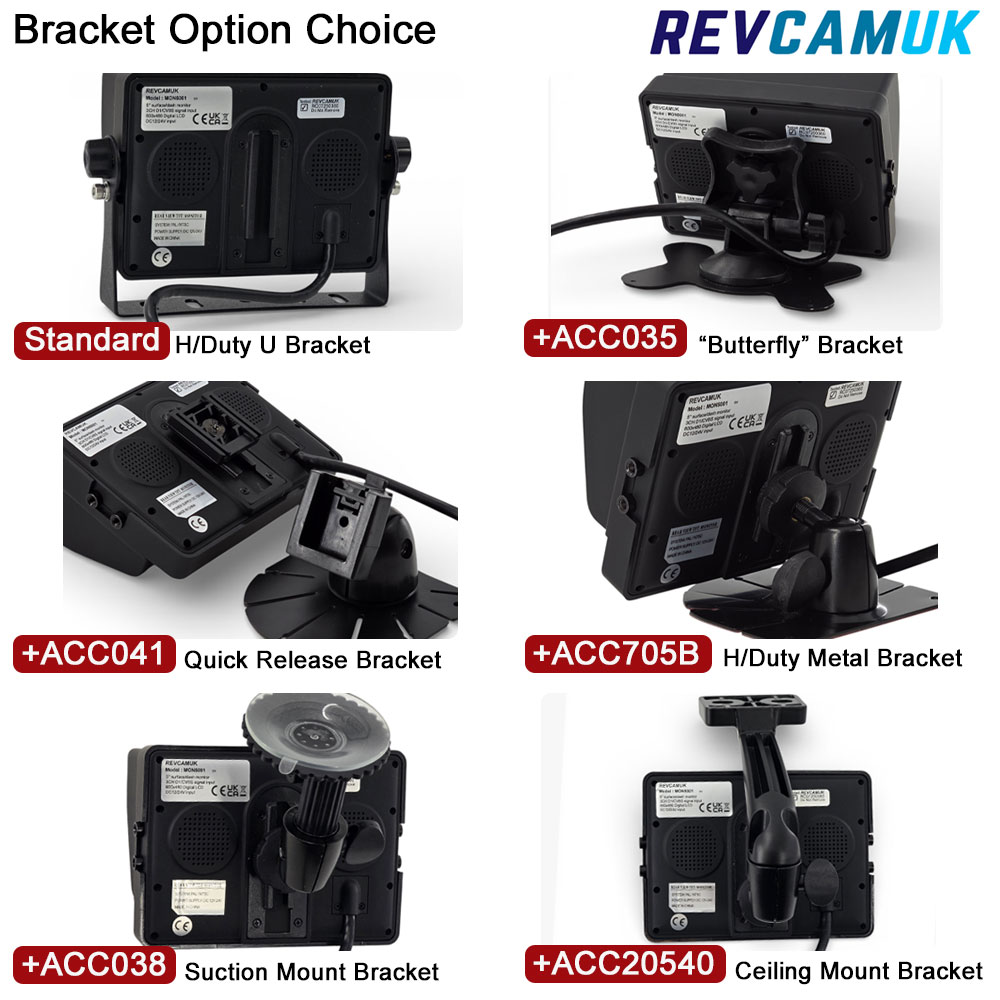
Bracket option choice for RevcamUK MON5001 5 inch reversing camera monitor showing standard U bracket and optional mounting brackets
Yes you can, the monitor powers the camera, this means you can choose to watch the camera at any point, you can drive with it "always on".
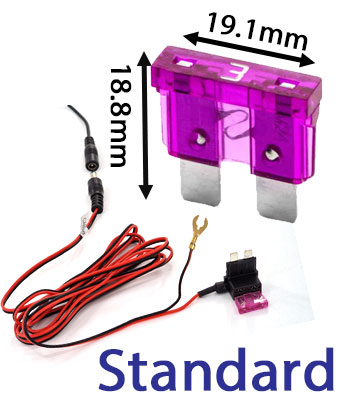
Our easy wire fuse tap options are new for 2023. We designed a fuse tap that plugs in to a socket that is present on all of our monitor wiring harnesses. The other side has a "piggyback" fuse holder aka fuse tap. You identify a fuse in the fuse box that comes on/off with the ignition (see piggyback fuse holder / fuse tap instructions here - PDF download). The original fuse is placed in to the new fuse tap, plus there is a new fuse already present for the reverse camera kit. On the same wiring there is an earth terminal connector, simply attach this to a chassis bolt (usually near the fuse box, or add your own).
 |  |
Rough guide:
- 10M is good for a medium length van (around 6M)
- 12.5M is good for most vehicles up to around 8.5M long (covers most motorhomes except the super long)
- 15M is good for vehicles up to around 10/11M eg rigid lorry, small coach
There could be a number of reasons they may be cheaper than us, the most common are below :
- They may be Rejected Production Runs - This is more common on the marketplaces where there are a lot of non-UK businesses (although the stock is often in the UK). When one of the larger factories produces a camera they will age-test a batch to ensure that the quality is sufficiently high to be able to send to their big customers (like us). If a production run fails this test with a high enough number having issues, the whole batch is often sold off for "recycling" the components. Sadly, these get placed in a container setting sail to the UK and other destinations, and eventually listed on a marketplace at crazy low prices - lower than we can buy hundreds at a time for. Sometimes you are lucky, sometimes you are not, depending on how badly the batch failed.
- They likely Use Cheaper/Poorer Grade Components - With the cameras, there are different standards of image sensor, support chips, lenses and camera bodies. With the monitors, there are different grades of LCD panels, and main boards. For both camera and monitor, we prioritise quality; the results speak for themselves. We didn't earn our reputation by buying as cheap as we could; it's not what our customers want. Although at the same time we really do keep our prices as low as possible. The cheaper prices help us to sell more volume, which means we can bring the cameras in by ocean shipping, saving freight costs, which we pass to the consumer.
- Produced by a "Factory for the day" - We have seen some shocking quality cameras sent to us over the years by customers. There is a phenomenon in China where someone can rent factory space for a day or two in order to complete a production run. Often this is a factory employee that is trying to go it alone and start his own business. Sadly, they don't often have the best engineers, they usually buy the lowest price/quality components, have the lowest standard of production line worker, and they can't afford to reject a bad production run. These usually either end up on a Marketplace or sold directly from a Chinese website.
In short, trust us to find the best quality and support you for safety and peace of mind.
Yes, as standard the reversing camera is set to display static coloured guidelines on to the image produced. These can be removed if you prefer. Simply cut the small trigger loop close to the brake light camera connection. See sticker on box for more details as some models have more than one function loop available.
Our general 4 pin cable reversing camera kit based fitting instructions.
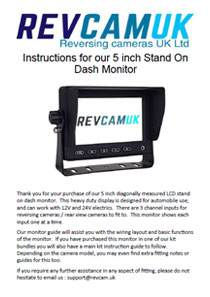
Our compact-sized heavy-duty monitor display. Guide to fitting and the on-screen menu.
Monitor5” Colour LCD screen Driving camera (upper camera) Sensor: 1/3 PC4089 CMOS Effective Pixels: 976(H) x 592(V) TV line: 700 TVL TV system: NTSC Lens: 2.6mm Min illumination: 0.1 LUX Waterproof: IP68 View angle: V 65 degrees, H 80 degrees D 105 degrees Camera lens adjustment: 20 degrees up and down Voltage: 12 volts Current consumption: 150mA Operating temperature: -20 to 70 degrees C Certificates: FCC, CE, E-mark, RoHS Connector: 4 pin aviation Reversing camera (lower camera) Sensor: 1/3 PC4089 CMOS Effective Pixels: 976(H) x 592(V) TV line: 700 TVL TV system: NTSC Lens: 1.9mm Min illumination: 0.0 LUX (IR LED on) IR LEDs: 8 pcs Night vision: 10m Waterproof: IP68 View angle: V 85 degrees, H 130 degrees D 160 degrees Camera lens adjustment: 20 degrees up and down Voltage: 12 volts Current consumption: 150mA Operating temperature: -20 to 70 degrees C Guideline: Optional (some have a trigger wire to select) Certificates: FCC, CE, E-mark, RoHS Connector: 4 pin aviation |


