0 £0.00
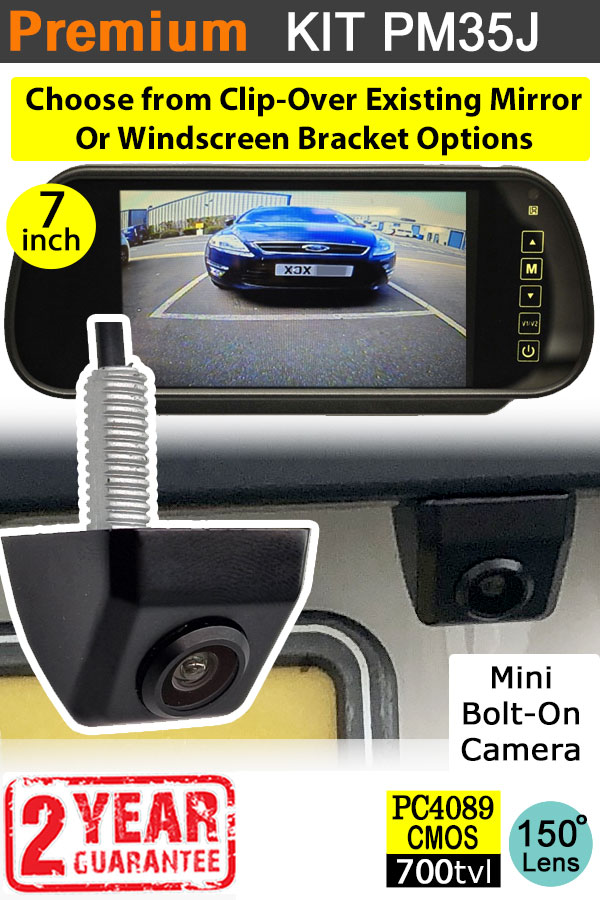
Bolt to Numberplate Reversing Camera Kit with Mirror Monitor - PM35J
Description
PM35H : Bolt to number plate reversing camera kit with 7" mirror monitor
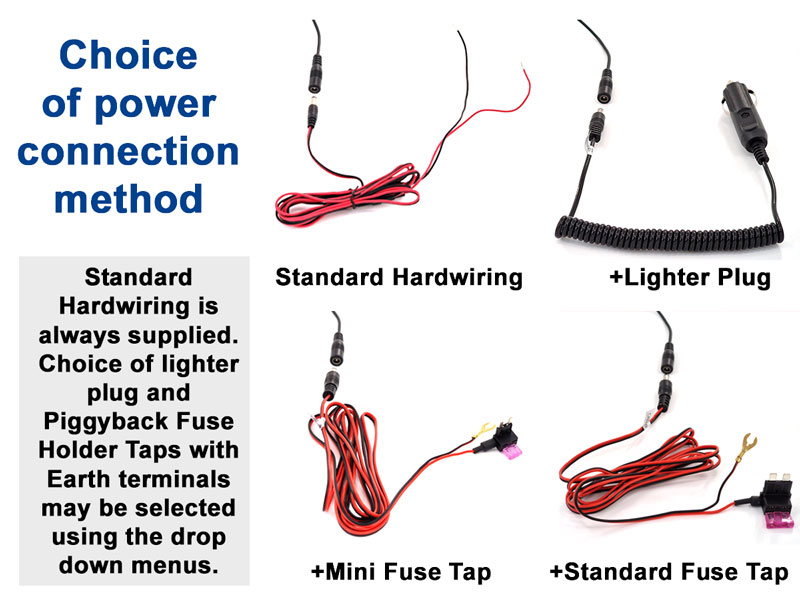
Choice of kit power options
 Easy-Fit Wiring
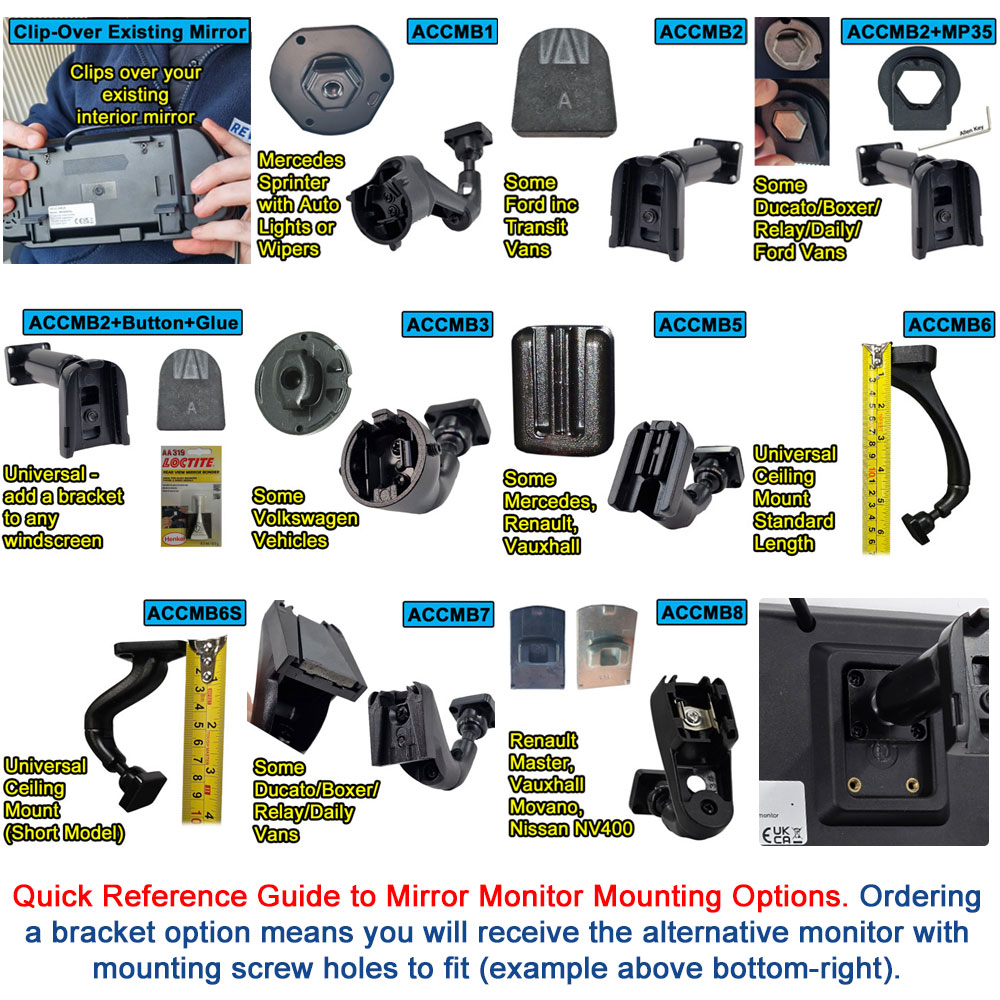
Please note that on this camera there are parts on the wiring that must be kept away from water. With numberplate cameras this is usually not a problem as the wire enters the vehicle body close to where the camera is mounted. The only issue would be if mounting on a trailer where the wiring will not be entering an enclosed space. Mirror Mounting OptionsFor many years we have supplied the universal clip-over existing interior mirror rear-view monitor. More recently we have also begun to offer the monitor with a variety of direct-to-windscreen stalk brackets. We have windscreen brackets to fit the most popular van and motorhome models, as well as a universal option where you can glue a mounting plate to the windscreen for a bracket to fit. See our guide below for more information about the different bracket options. 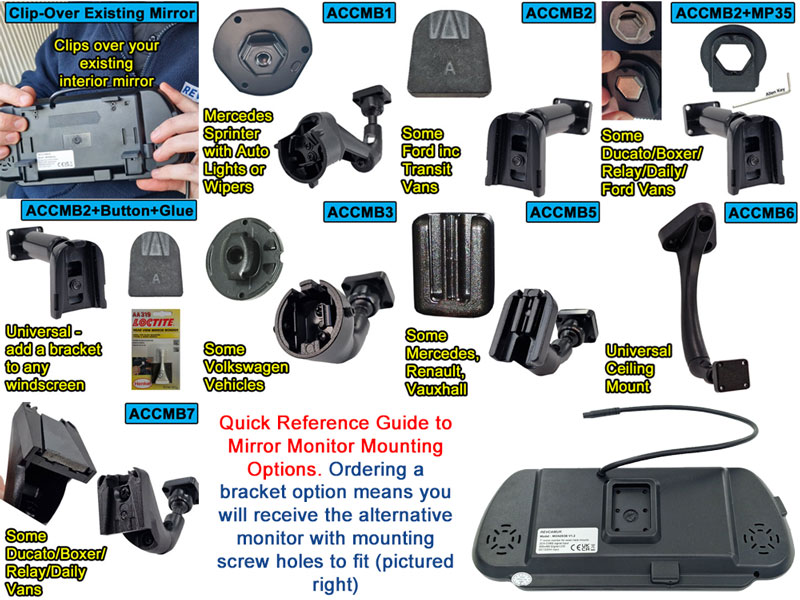 Some popular van models are listed below with the bracket options we commonly see. This is a rough guide, and we have seen lots of variation. If in doubt, Email Us a clear photo of what you have fitted to your windscreen. ACCMB1 – Mercedes Sprinter with auto lights/wipers only | View full details of this mounting bracket (opens in new tab)
ACCMB2 – Some Ford / universal | View full details of this mounting bracket (opens in new tab)
ACCMB2 + MP35 – Later Ducato / Relay / Boxer etc. | View full details of this mounting bracket (opens in new tab)
ACCMB2 + Button + Glue – For windscreens with no mounting plate for mirror | View full details of this mounting bracket bundle (opens in new tab) For vehicles that have no mounting plate fitted, this option provides you with a universal mounting plate, a bracket to fit this plate, and the Loctite 319 glue designed to fix it to your windscreen. We have researched and produced detailed fitting instructions for fixing the windscreen rear-view mirror mounting plate with Loctite 319 – read these carefully to avoid any issues. ACCMB3 – Some Volkswagen | View full details of this mounting bracket (opens in new tab) Various Volkswagen vehicles such as:
ACCMB5 – Some Mercedes / Renault / Vauxhall / others | View full details of this mounting bracket (opens in new tab)
ACCMB6 – Universal ceiling bracket (long drop) | View full details of this mounting bracket (opens in new tab)
ACCMB6S – Universal ceiling bracket (short drop) | View full details of this mounting bracket (opens in new tab)
ACCMB7 – Some Citroen Relay / Peugeot Boxer / Fiat Ducato / Iveco Daily | View full details of this mounting bracket (opens in new tab)
ACCMB8 – Some Renault Master / Vauxhall Movano / Vivaro / Nissan NV400 | View full details of this mounting bracket (opens in new tab)
2 Year GuaranteeWe supply with a 2-year Guarantee with us, meaning we will repair or replace any non-user damaged parts that are deemed faulty. Our failure rate is very low even beyond these two years, if you have a problem outside of 2 years we should still have compatible parts and possible repairs for reasonable amounts.  Parts Tested in the UKThe parts of this kit will have been tested twice, once by the factory and once by us. We check all the items in the kit including all cables, trigger wires, and menu functions to reduce any chance of having a non-working part. Our fault rate is extremely low, and we just like to ensure that we avoid any imperfection slipping past. This is why professional fitters love us. |
Detailed Images
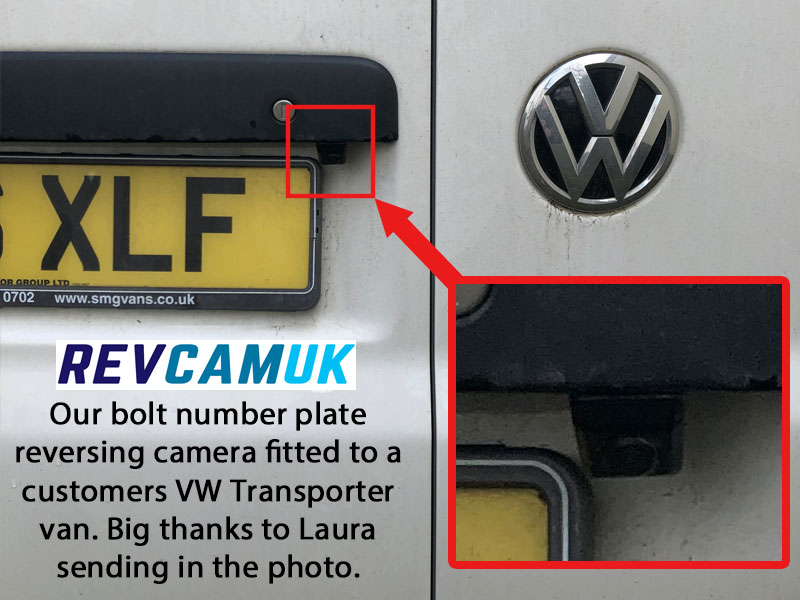
Bolt fitting umber plate reverse camera fitted to a VW Transporter van
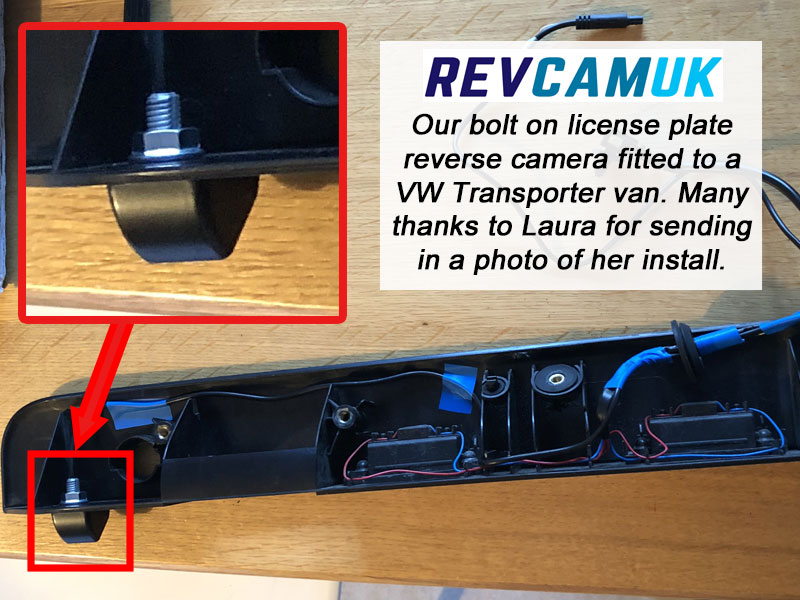
Bolt on license plate reverse camera installed to the trim above number plate on a VW Transporter van
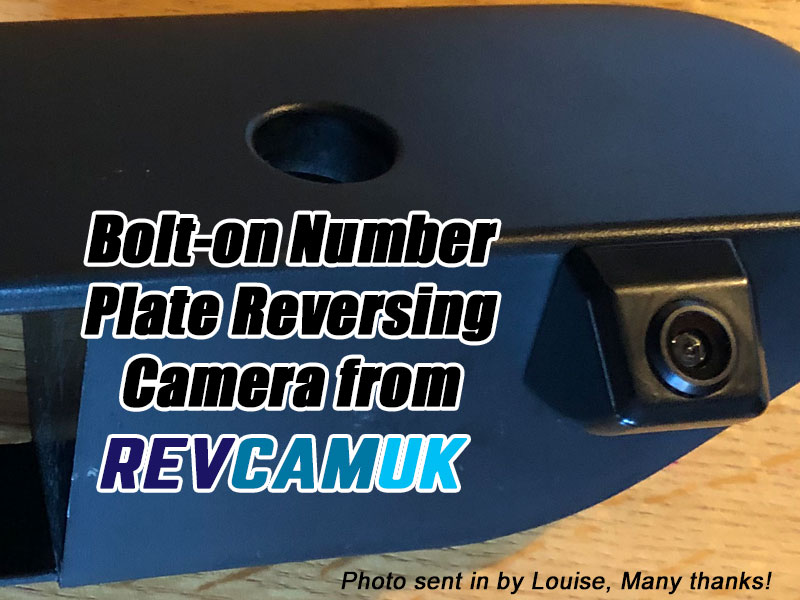
Close up photo of bolt to number plate light area reversing camera fitted
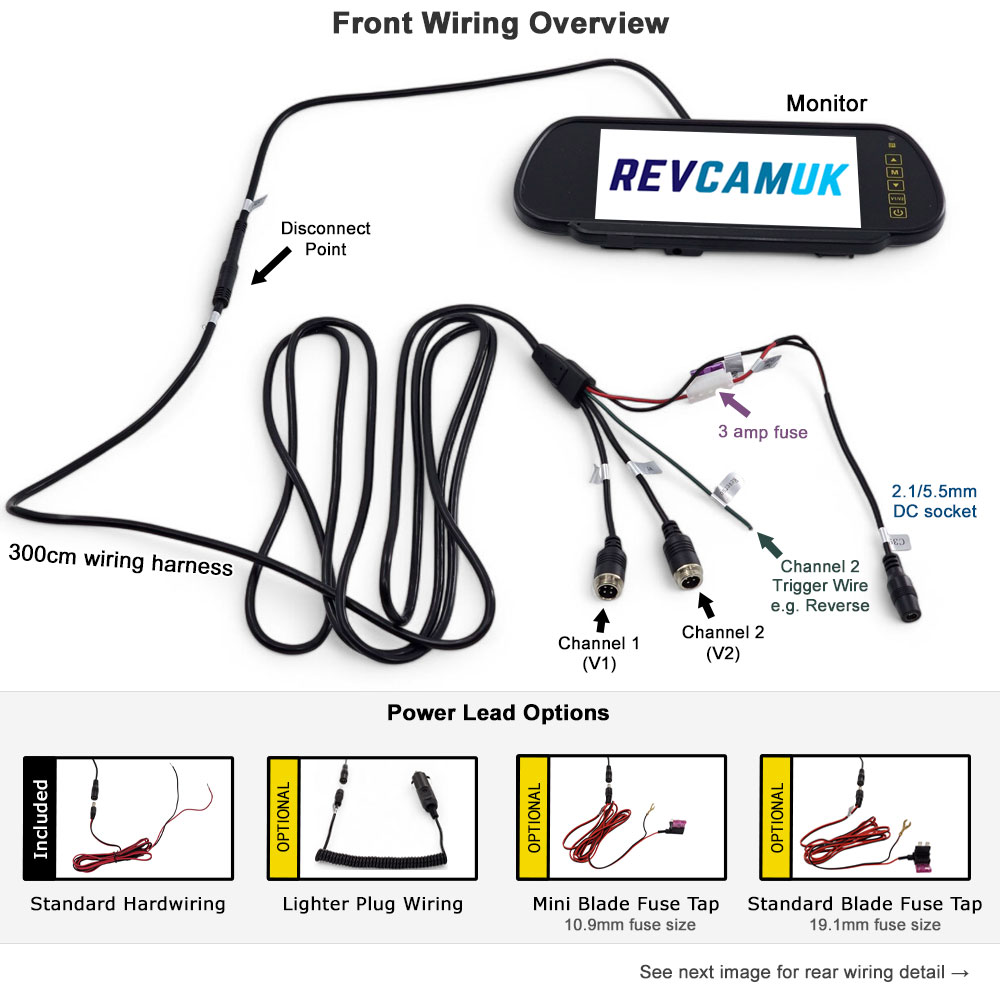
Front wiring overview for RevcamUK mirror monitor reversing camera system
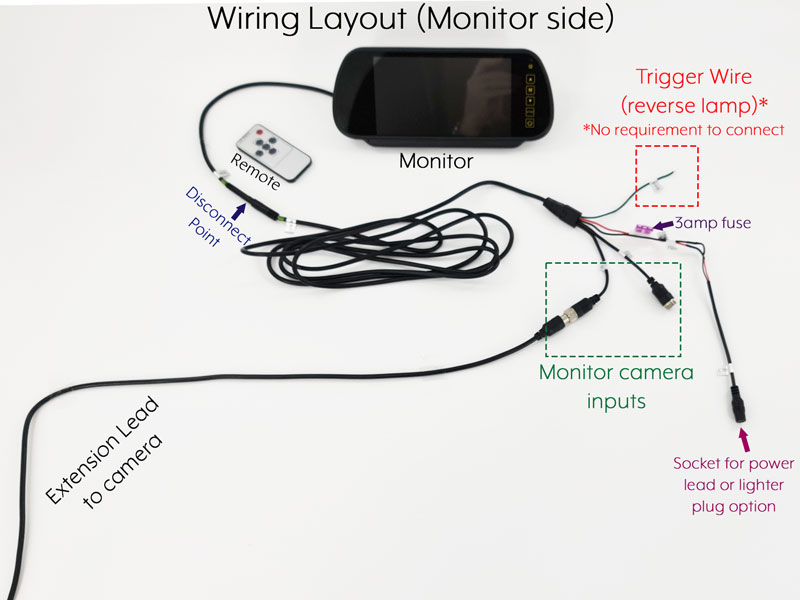
Wiring Layout (monitor side)
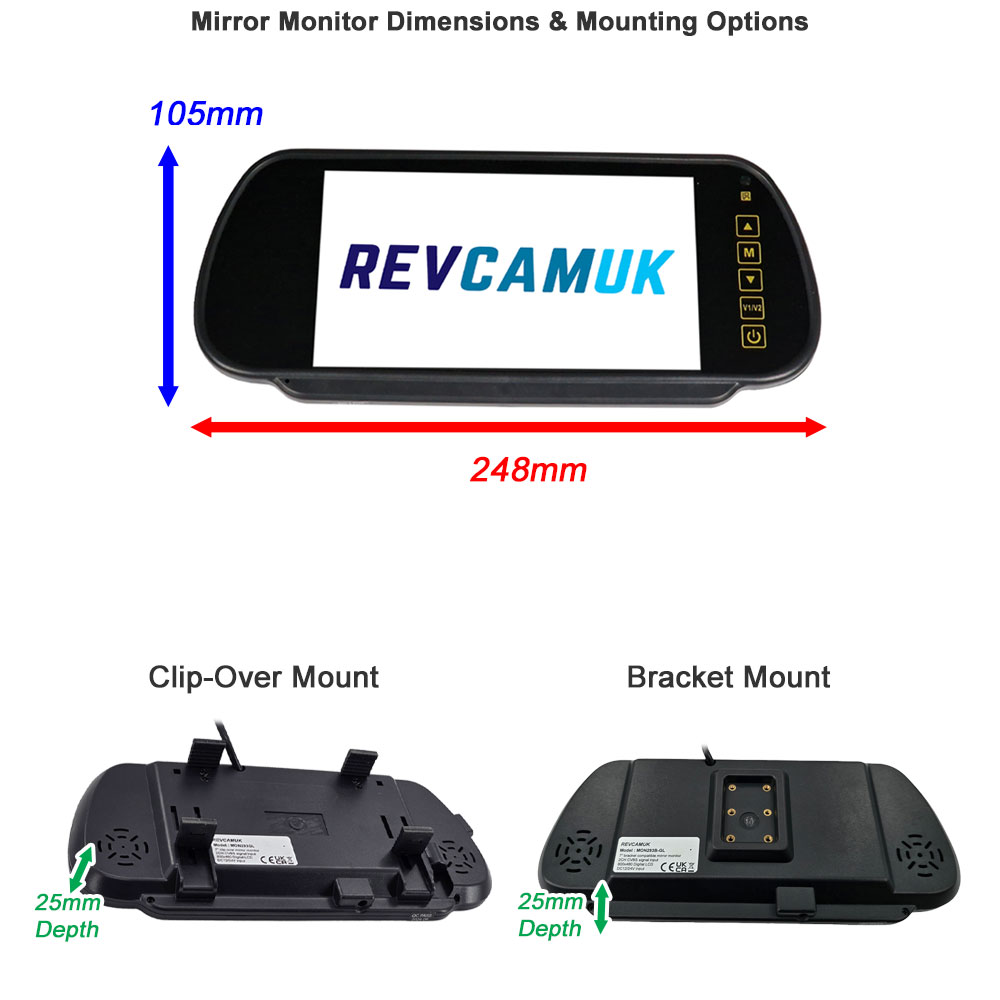
Mirror monitor dimensions with clip-over and bracket mounting options for reversing camera systems
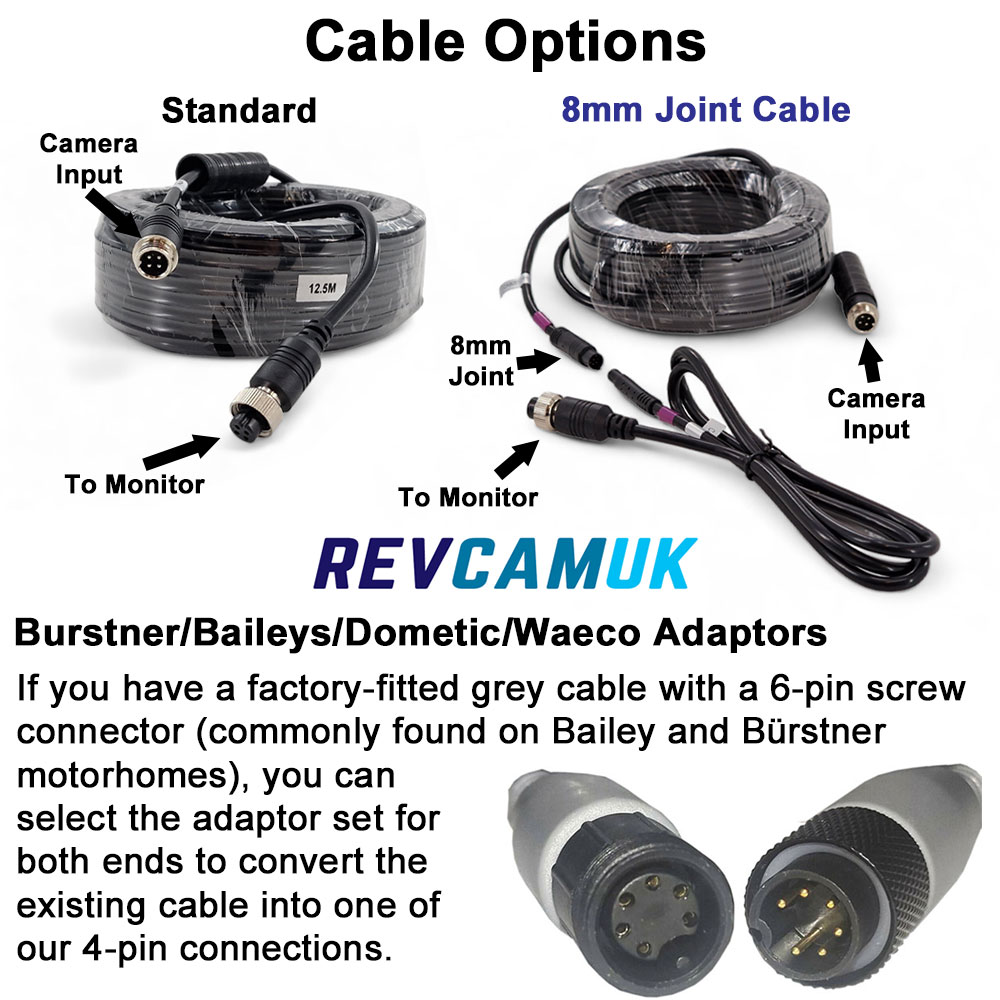
RevcamUK cable options showing standard 4 pin extension cable, 8mm joint cable and 6 pin adaptor connectors for Bailey, Bürstner, Dometic and Waeco motorhomes
Mirror monitor bracket mounting options including clip-over and windscreen bracket choices
Yes you can, the monitor powers the camera, this means you can choose to watch the camera at any point, you can drive with it "always on".
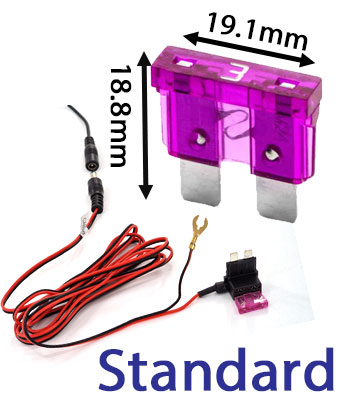
Our easy wire fuse tap options are new for 2023. We designed a fuse tap that plugs in to a socket that is present on all of our monitor wiring harnesses. The other side has a "piggyback" fuse holder aka fuse tap. You identify a fuse in the fuse box that comes on/off with the ignition (see piggyback fuse holder / fuse tap instructions here - PDF download). The original fuse is placed in to the new fuse tap, plus there is a new fuse already present for the reverse camera kit. On the same wiring there is an earth terminal connector, simply attach this to a chassis bolt (usually near the fuse box, or add your own).
 |  |
Rough guide:
- 5M is good for an average size car
- 7.5M is good for large cars and shorter wheelbase vans
- 10M is good for a medium length van (around 6M)
- 12.5M is good for most vehicles up to around 8.5M long (covers most motorhomes except the super long)
- 15M is good for vehicles up to around 10/11M eg rigid lorry, small coach.
- 20M is good for super long vehicles

Monitor7” Diagonally Measured Colour LCD screen CameraImage device:- PC4089 CMOS sensor |
Related Products

Pole/Bolt Number Plate Reversing Camera Kit with 5" Dash Monitor - PM55J
£159.00
VAT Included
£26.50 

7" Heavy Duty Dash Screen + Bolt on Numberplate Reversing Camera Kit - PM85J
£169.00
VAT Included
£28.17