0 £0.00
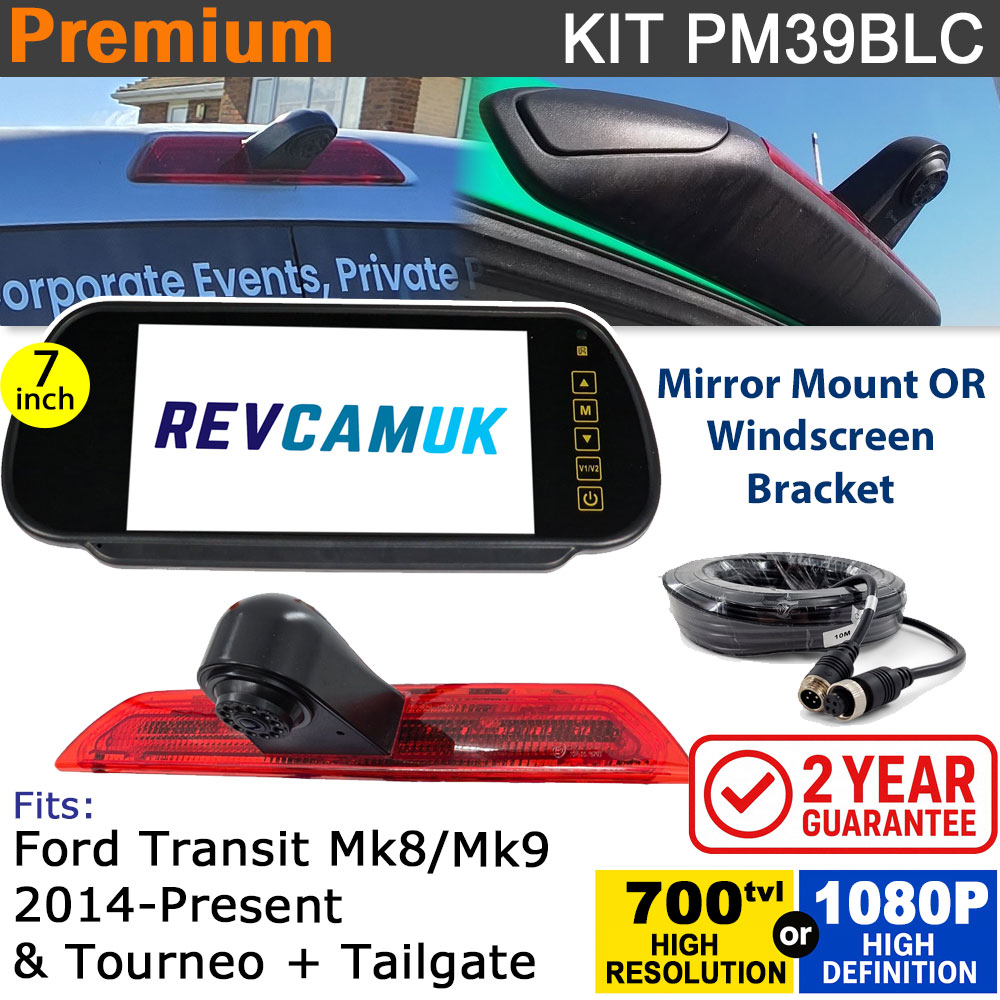
Ford Transit Mk8/Mk9 (2014+) Brake Light Reversing Camera kit with 7" Mirror Display - PM39BLC
Description
About the Ford Transit Mk8/Mk9 2014+ brake light reversing camera kit with 7" mirror monitor
What vehicle does this fit?Ford Transit 2014-Present Ford Transit Tailgate Version 2014-Present Ford Tourneo Custom 2014-Present Please note :- if you have a small Transit custom with the split type brake light, then this won't fit (we do carry the split Transit Custom brake light on other listings). Mirror Monitor Mounting OptionsWe stock a number of different mounting options for the mirror monitor, depending on what you currently have fitted to your van. Kindly note that if you choose any mount other than the clip-over original mirror, and your van has a plastic trim cover that hides the metal mirror mount button, this will need to be removed and won't fit back on without modification. See the image below that was sent in by Rori of the 1-inch section he removed with a Dremel multitool so that it could fit back on.  Clip over original mirror option (Default)This type of mirror monitor has spring loaded clips on the rear, instead of screw holes for our swan neck brackets to fit. Ideal if you have a van that already has an interior mirror fitted. This option requires no modification to any trim. 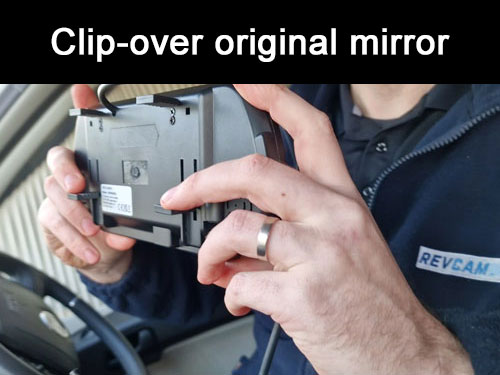 ACCMB2 Option - Fit to OEM Ford windscreen button (Type 1 - Most Common)This is the most commonly seen windscreen button fitted to various Ford Transits, especially on vehicles without auto wipers/lights. Selecting this option will mean your monitor is changed to a type that accepts windscreen mount swan neck brackets, and the bracket below will be provided in the kit. *Kindly note that if you have a plastic trim cover that hides the metal button, this will need to be removed and likely won't fit back once the bracket is in position. Although we have been told that this isn't too much of an issue since the mirror monitor mostly hides this anyway. 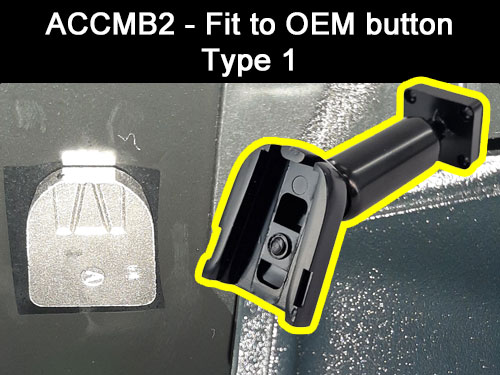 ACCMB2 + MP35 Option - Fit to OEM Ford windscreen button (Type 2 - Hex Shape Version typically vans with auto lights/wipers)This is the type we expect to see on Ford Transit vans that are fitted with either auto lights or auto windscreen wipers. A hexagonal shape, an OEM mirror would have mounted on with a quarter turn twist clockwise. This option includes our mounting plate 35 (MP35) which turns the hex shaped metal windscreen plate in to the Ford slide down plate for the ACCMB2 bracket to attach to. *Kindly note that if you have a plastic trim cover that hides the metal button, this will need to be removed and likely won't fit back once the bracket is in position. Although we have been told that this isn't too much of an issue since the mirror monitor mostly hides this anyway. 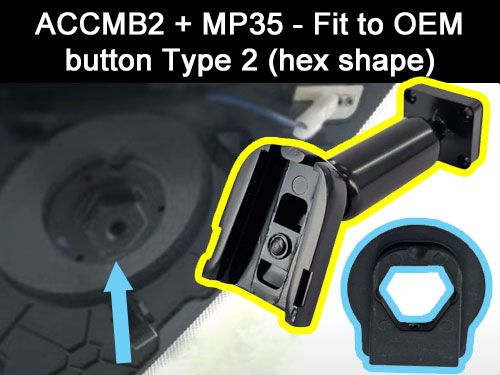 ACCMB2 + Button + Glue - Adds a new Ford windscreen button to vans without oneIf you have no metal windscreen button to attach our bracket to, then you can add your own. This option provides the Ford windscreen stalk, plus the Ford windscreen button, as well as the Loctite 319 glue. Please see our instructions on how to glue a mirror button to the windscreen. Download our PDF fitting instructions for fitting the windscreen button with Loctite 319 mirror button adhesive. 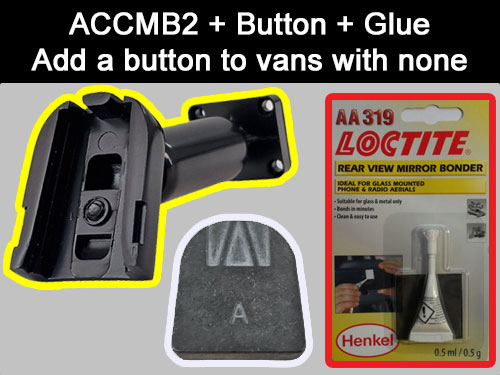 Choice of kit power options
 Easy-Fit Wiring
Image Sensor for CameraThis particular system uses the PC4089 1/3" Hi-Res CMOS image sensor (not to be confused with the older technology low res CMOS), this runs at 700TVL and gives a really crisp picture with a good colour replication. We use 4xglass composite lens instead of the cheaper 2xglass, 2xplastic lenses, which cloud/fade over time due to UV exposure. With our camera you can be assured of good performance and long term reliability. 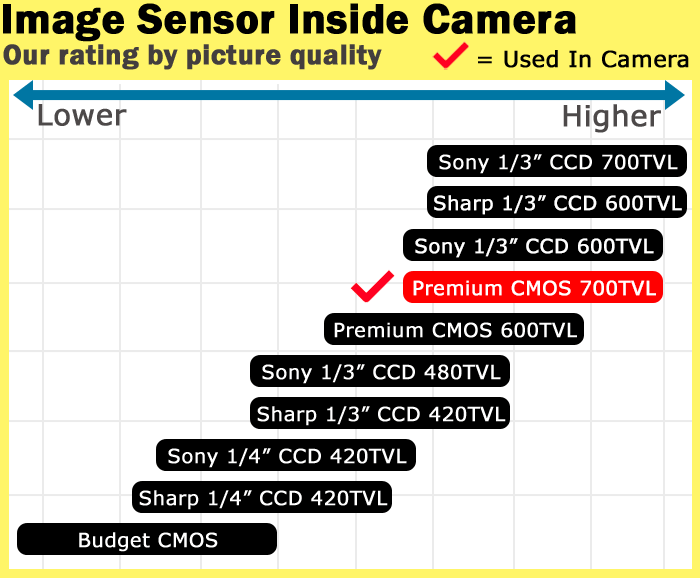 Monitor has Digital LCD Panel - Not Standard LCDOur monitor uses a Hi-Res digital panel LCD screen with an 800x480 pixel display. To complicate matters we have seen a difference in quality between 800x480 pixel panels. We only stock LCD panels that have the brightest backlights, and the best colour replication. This costs us approx. 50% more than we could buy the monitors for, however, the reliability, picture quality, our reputation in keeping our many return customers happy, means we are willing to pay the extra (you get what you pay for!). 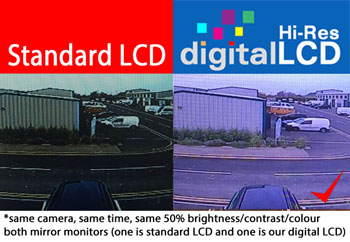 2 Year GuaranteeWe supply with a 2 year Guarantee with us, meaning we will repair or replace any non-user damaged parts that are deemed faulty. Our failure rate is very low even beyond these two years, if you have a problem outside of 2 years we should still have compatible parts and possible repairs for reasonable amounts.  Parts Tested in the UKThe parts of this kit will have been tested twice, once by the factory and once by us. We check all the items in the kit including all cables, trigger wires, IR leds and menu functions to reduce any chance of having a non working part. Our fault rate is extremely low, and we just like to ensure that we avoid any imperfection slipping past. This is why professional fitters love us. |
Detailed Images
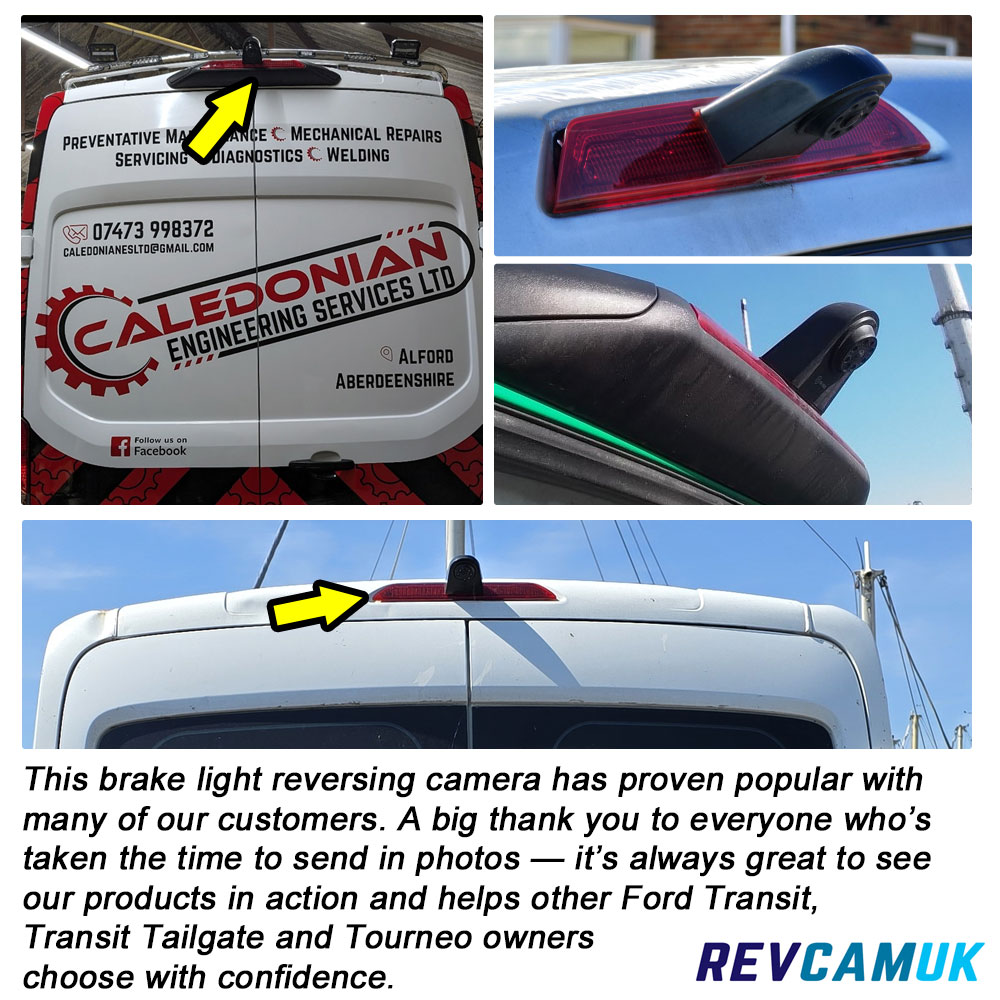
Ford Transit and Transit Tourneo brake light reversing camera customer installation photos – REVCAMUK

Rear View Mirror Monitor for Reversing Camera - Attachment Options Images
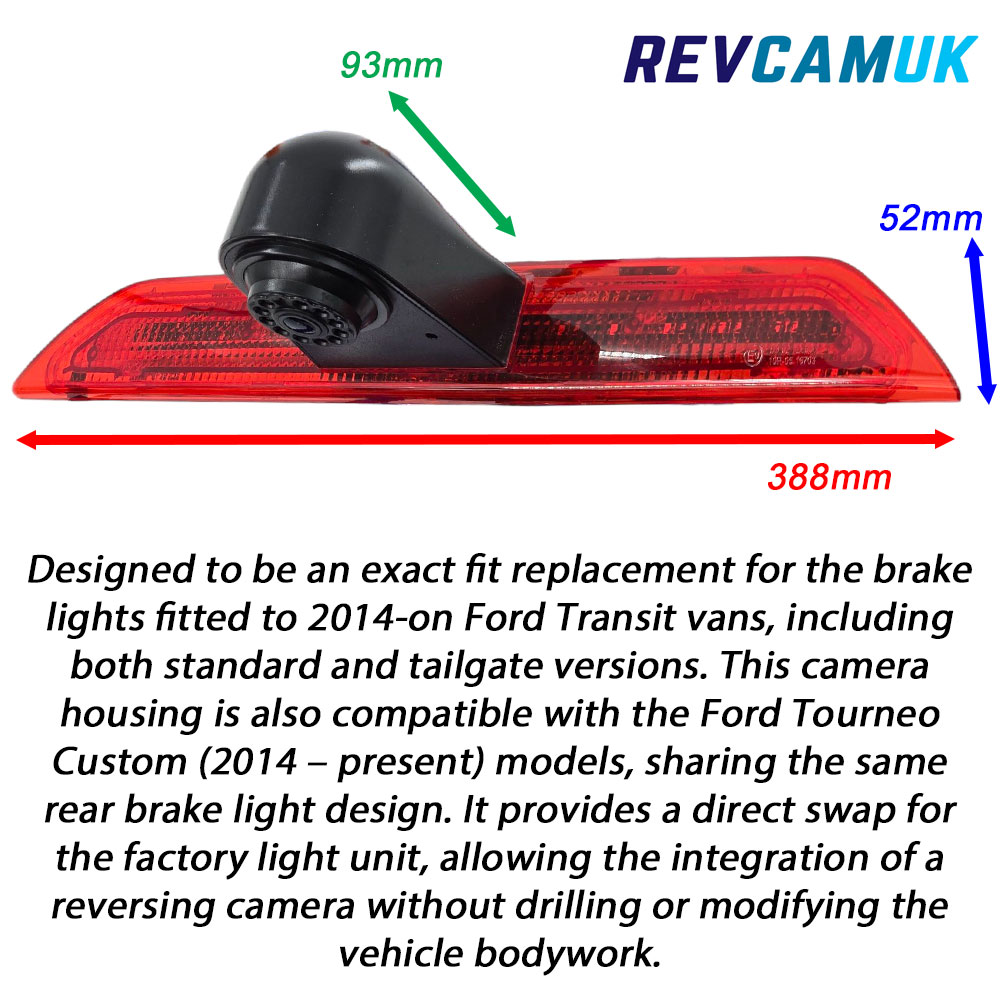
Ford Transit and Tourneo Custom brake light reversing camera with dimensions 388mm wide, 52mm high, and 93mm deep - REVCAMUK.
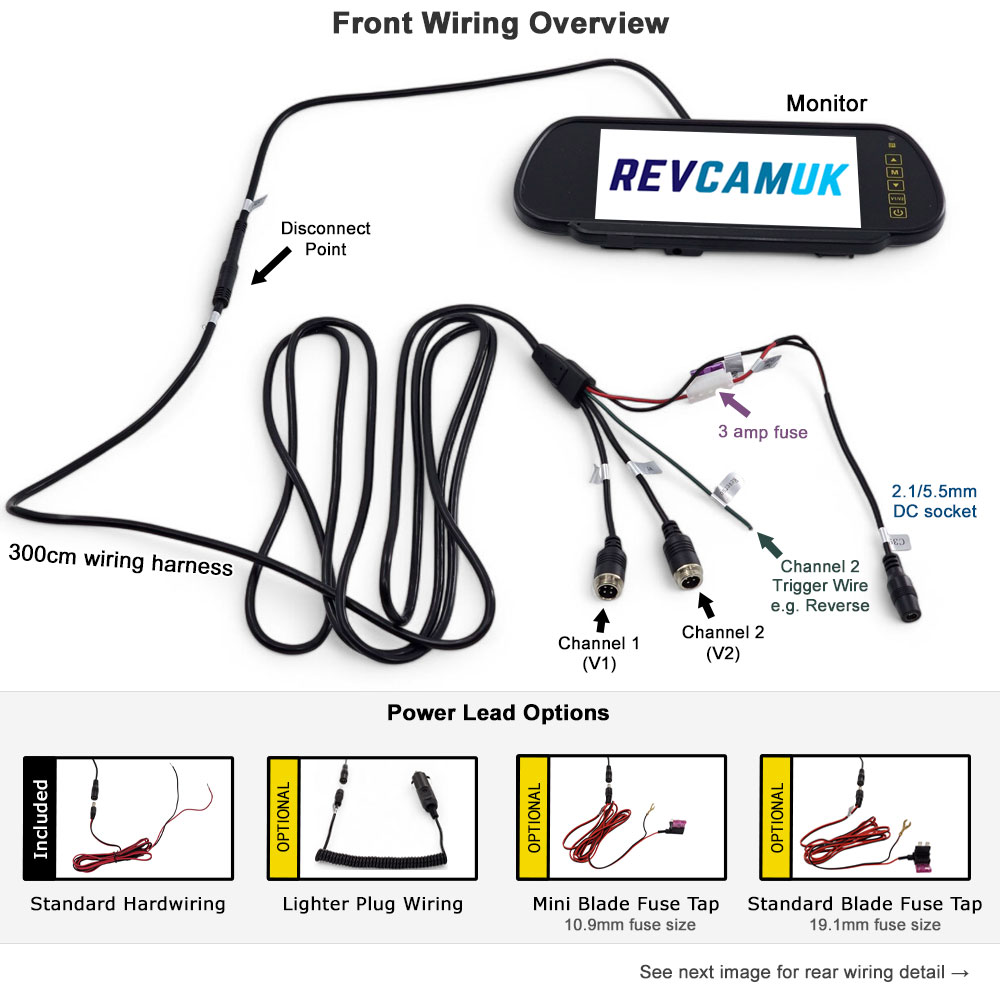
Front wiring overview for RevcamUK mirror monitor reversing camera system
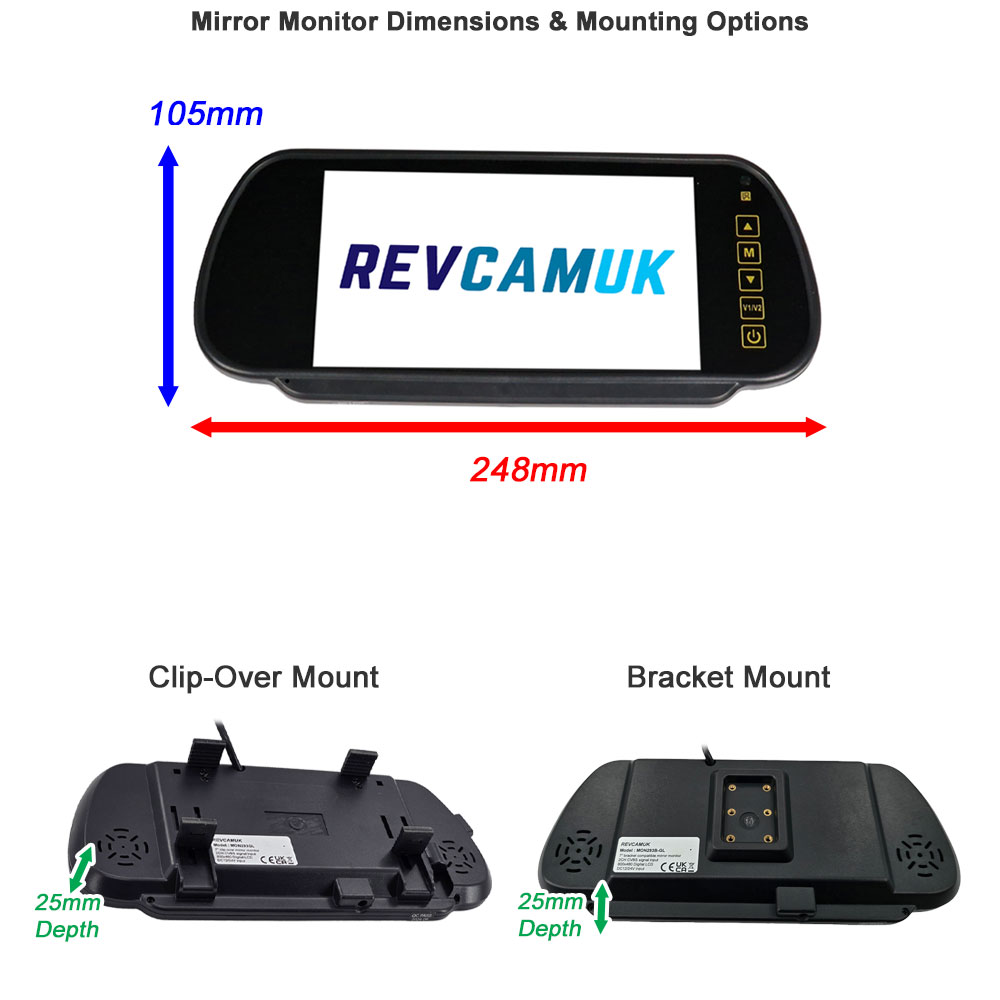
Mirror monitor dimensions with clip-over and bracket mounting options for reversing camera systems
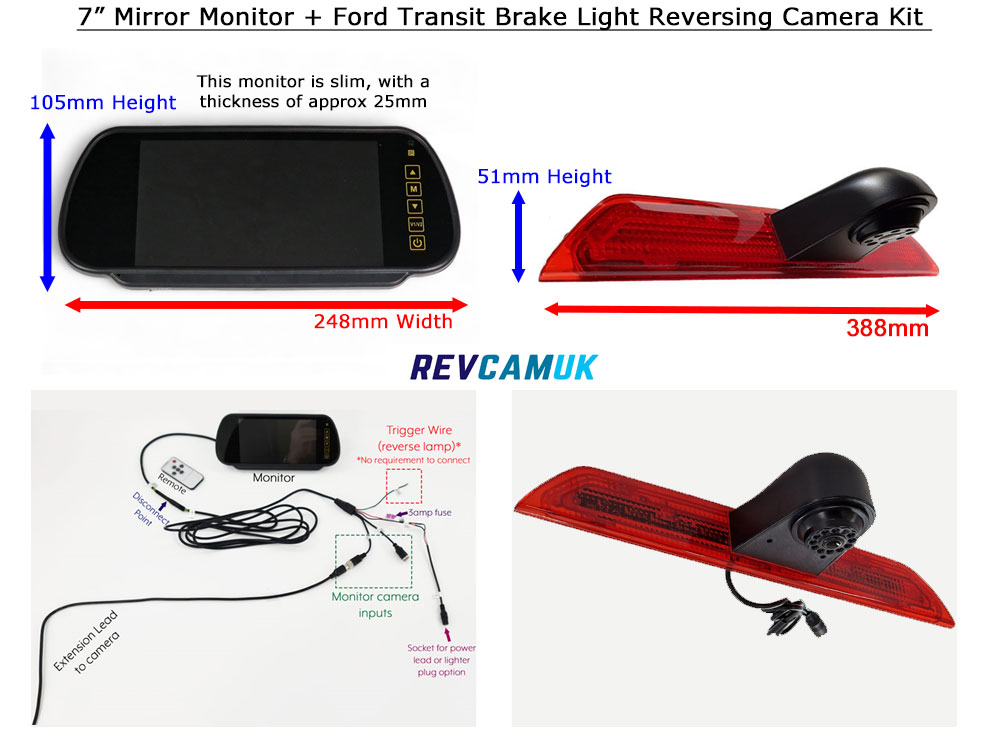
Dimension and wiring layout of the mirror monitor reversing camera kit for Ford Transit Brake Light
Yes you can, the monitor powers the camera, this means you can choose to watch the camera at any point, you can drive with it "always on". It is worth noting that the camera faces downwards, so it may not be used as a rear view driving camera.
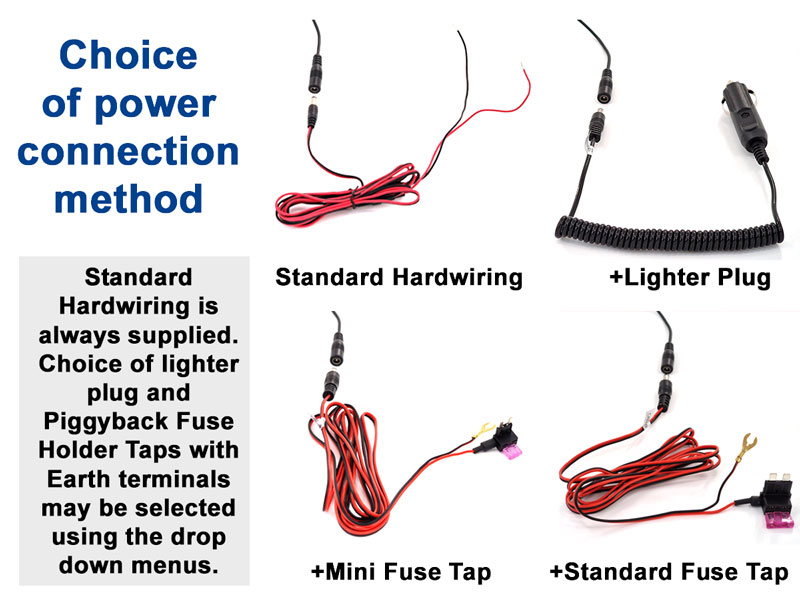
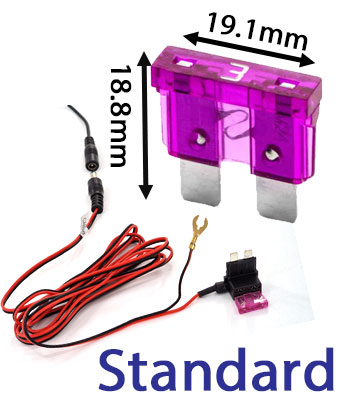
Our easy wire fuse tap options are new for 2023. We designed a fuse tap that plugs in to a socket that is present on all of our monitor wiring harnesses. The other side has a "piggyback" fuse holder aka fuse tap. You identify a fuse in the fuse box that comes on/off with the ignition (see piggyback fuse holder / fuse tap instructions here - PDF download). The original fuse is placed in to the new fuse tap, plus there is a new fuse already present for the reverse camera kit. On the same wiring there is an earth terminal connector, simply attach this to a chassis bolt (usually near the fuse box, or add your own).
 |  |
Yes, absolutely. You can also choose to hard wire it at a later point. Some people order the lighter plug option simply to try it out before they wire it in permanently.
Yes it does. The camera outputs its own fixed guidelines (these can be turned off by snipping a small loop of wire that is next to the cameras connector). The monitor can also add guidelines itself, these will only be shown if you connect up the green reverse trigger wire on the monitor wiring. The advantage of using the monitors guideline function instead of the cameras is that you can adjust the position on the monitors guidelines (see the instructions tab for the downloadable PDF on how to do this).
There could be a number of reasons they may be cheaper than us, the most common are below :
- They may be Rejected Production Runs - This is more common on the marketplaces where there are a lot of non-UK businesses (although the stock is often in the UK). When one of the larger factories produces a camera they will age-test a batch to ensure that the quality is sufficiently high to be able to send to their big customers (like us). If a production run fails this test with a high enough number having issues, the whole batch is often sold off for "recycling" the components. Sadly, these get placed in a container setting sail to the UK and other destinations, and eventually listed on a marketplace at crazy low prices - lower than we can buy hundreds at a time for. Sometimes you are lucky, sometimes you are not, depending on how badly the batch failed.
- They likely Use Cheaper/Poorer Grade Components - With the cameras, there are different standards of image sensor, support chips, lenses and camera bodies. With the monitors, there are different grades of LCD panels, and main boards. For both camera and monitor, we prioritise quality; the results speak for themselves. We didn't earn our reputation by buying as cheap as we could; it's not what our customers want. Although at the same time we really do keep our prices as low as possible. The cheaper prices help us to sell more volume, which means we can bring the cameras in by ocean shipping, saving freight costs, which we pass to the consumer.
- Produced by a "Factory for the day" - We have seen some shocking quality cameras sent to us over the years by customers. There is a phenomenon in China where someone can rent factory space for a day or two in order to complete a production run. Often this is a factory employee that is trying to go it alone and start his own business. Sadly, they don't often have the best engineers, they usually buy the lowest price/quality components, have the lowest standard of production line worker, and they can't afford to reject a bad production run. These usually either end up on a Marketplace or sold directly from a Chinese website.
In short, trust us to find the best quality and support you for safety and peace of mind.
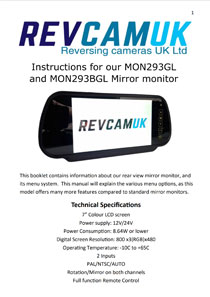
Our guide to the menu system and monitor. Covers the adjustable guidelines that can be added when reverse gear is connected to the green trigger wire on monitor wiring harness.
Monitor7” Diagonally Measured Colour LCD screen CameraSensor: 1/3" PC4089 CMOS |
Related Products
 Rear View Camera + Reversing Camera kit for Brake Light with a 7\" Mirror Display - PM39BLCTW")
 Brake Light Reversing Camera kit with 5\" Monitor Display - PM59BLC")
Ford Transit Mk8/Mk9 (2014+) Brake Light Reversing Camera kit with 5" Monitor Display - PM59BLC
£189.00
VAT Included
£31.50  Brake Light Reversing Camera kit with 7\" Monitor Display - PM69BLC")
Ford Transit Mk8/Mk9 (2014+) Brake Light Reversing Camera kit with 7" Monitor Display - PM69BLC
£199.00
VAT Included
£33.17  Twin Brake Light Reversing + Rear View Camera kit with 5\" Monitor Display - PM59BLCTW")
 Twin Lens Brake Light Rear View + Reversing Camera kit with 7\" Monitor Display - PM69BLCTW")


Ford Transit 2014+ Twin Reversing Camera + Rear View Camera to fit brake light | CAM1733TW
£149.00
VAT Included
£24.83